Showing posts with label decorating tips. Show all posts

Tuesday, November 5, 2013

laundry room progress ... and tips for selecting a great painter

To say the last 10 days have been crazy would be a huge understatement! Renovating in the middle of football season, I mean those two things are hectic in and of themselves... Add them together with all the other things that happen in life, and you have a very hectic reno! While technically, I was supposed to have 31 posts in the month of October for the "31 days challenge" - life happened. So, I will definitely complete the series, but more like by the middle of November! ha 


Anyway... The final details have been added and priming in the laundry room began yesterday! 
I absolutely love the contrast of the black window against the white walls and cabinetry. The countertop in here will be black as well, so the window and countertops will complement each other nicely. I am contemplating an awesome wall covering in here, too... more on that after my visit to the Design Center soon! 


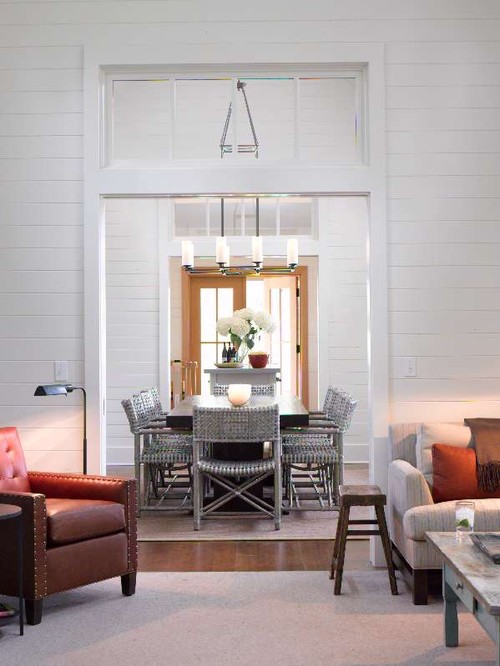
future gift wrap station (right side of LR) 


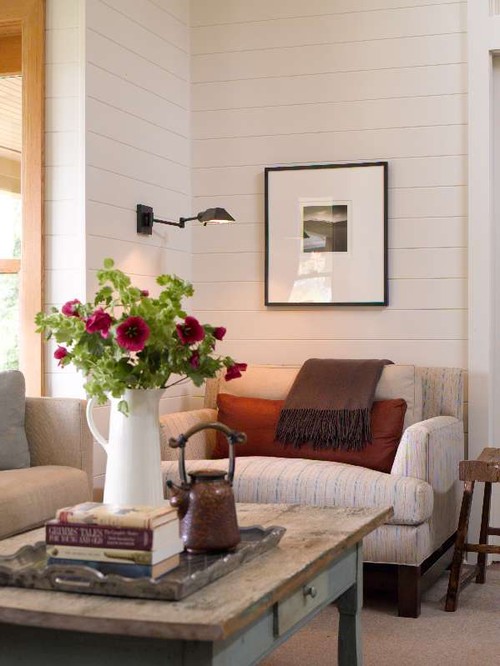
hidden hot water heater and cabinets (left side of LR)

For the first phase of this renovation, we used "Painter A" - we needed the whole house, all walls, ceilings, doors, and trim painted - he came recommended and had the best price. For just painting, he did a good job and we saved a ton of money compared to the other bids we received... we didn't have any belongings in the house yet, so overspray wasn't really an issue.  Then...we had him come back to float and paint walls in a new bathroom and paint the screened porch. That was where we saw him trying to take short cuts and his quality of work was not what we saw the first time. Overspray was on the porch, porch floors, door, etc. We were glad when he left, never to return to our house again!

So for this phase, we are using "Painter B" - and we are so impressed with him and his crew! They have taken every precaution to prevent overspray on the walls and ceilings and other items in the laundry room, such as the hot water heater, which "Painter A" would have probably just ignored.  This crew takes their time and does the job right. Are they more expensive? Yes, but in the end it's worth it! Remember our motto "Do it right the first time!" I won't spend the next days and weeks cleaning up the mess that "Painter A" would have left behind.


The moral of the story, if you take a recommendation for a painter from a friend, make sure they painted the same items for your friend that they will be painting for you. A great wall and ceiling painter might not be a good cabinet painter - and vice versa. Also, did they paint before your friend moved in? Or after? Another great idea is for you to ask the painter what they will do as far as prep work before they begin painting - then you can point out any holes in their plan before they get started. 

Just a few little tidbits of helpful info after we learned the hard way!  


Tuesday, October 22, 2013

now, let's not be too farmy.


By now, you all know that I don't want a farmhouse with small plaid drapes, calico pillows, & red roosters in every room. However, I think it's important to embrace the style and surroundings of your home in your decor. So, here are some things that would fit my ::Farmhouse Chic:: style for our home, without being too farmy...

sliding barn door into the mudroom or pantry 

a good ol' southern welcome in the entry hall

 cowhide ottoman with sleek lines and nailhead trim. love it.


bringing some of the outside in with designer wallpaper

layer a cowhide rug over a sisal or jute rug


 a nice set of antlers to hold the watering hose

so maybe you gotta have something a little farmy, so it doesn't look like you forgot where you live

add a few southern quotes to a gallery wall 


Now you see how a few ways that "farmy" can be "classy." 


Sunday, October 6, 2013

What to do with all that inspiration...


So that we would all be on the same page, yesterday I shared the vision I created in my head for the FH before we ever began the renovation. You have to know where you are headed before you can begin a big reno project! Now, let's break it down and discuss how to take what you love about your inspiration photos and incorporate those details into your home.

How about we use one of my favorite FH details as our example- horizontal tongue and groove plank-clad walls.


Isn't that planking so endearing?! Imagine those rooms with just white sheet rock - I guarantee they wouldn't feel nearly as warm and inviting. LOVE.

I did know that it wouldn't be super cheap, though.  This is where you take your inspiration and make it work for your home and your budget!  Covering multiple walls in multiple rooms, as we saw in that first image, was definitely not going to fit in the budget. So, the hunt began for the perfect spot - not too big and not too small - where the planking could be added by our fabulous carpenter.  

Alrighty, I showed you this original wet bar area yesterday.  That wine rack is beautiful, but we prefer our wine chilled to in a wine fridge and the likelihood of us actually keeping the majority of those slots filled is slim.  In the initial walk through we decided that the wine rack was impractical for our family and needed to go...


that left me with a long empty wall - that would be an ideal candidate for some wood planking -similar to this image below. wahoo!  and yes, I do love that open shelving, too...


but covering just that amount of wall wasn't going to cut it. So if you walk out of the old wet bar above, hang a left, there is a small area of wall along the front of the stairs and a large wall above them. Now that amount of space would be perfect. And you would experience the loveliness and warmth that the planking brings the home as soon as you step in the front door. perfection.


and this handsome little guy is just too cute to leave out 

There you have it. Take what you love and make it work for you! After pics of the entry way and wet bar will be gracing the presence of this blog soon. 

Until then, enjoy yet another wonderful fall day and I will see you back here tomorrow!

Saturday, October 5, 2013

opposites attract.


You all know that we finally decided on a white for the walls , so now onto the doors.
The painter was painting all the walls and trim, so why not the doors, too? We wanted everything to look fresh and new. But fresh and new doesn't mean they have to be white! 
The pictures below caused me to fall in love with the idea of using contrasting opposites of white and black throughout our home. 


images
1 2 3 4 5 

Black doors, black windows, black built-ins. Oh my! Once I fell in love I just couldn't get enough! 

Originally we had planned to just paint the doors black.  Then, when those were painted and made such an impact, we decided to have the wet bar, pantry, and banister spindles painted black as well. Y'all. The contrast is amazing! 

So many friends have asked if we got all new doors because they can't believe that a regular 6-panel wooden door could make that much of a statement.  You should try it! But beware, your painter and contractor might think you are crazy. I got some weird looks in regards to what I wanted painted black, UNTIL they saw the finished product! And tell your painted ahead of time what you want to have painted black because they tend to think painting black is more difficult, so they may charge more. You'll likely want to know that up front!

The black we chose was Sherwin Williams Tricorn Black because it was the truest black, without red, blue, or brown undertones. 


You know I love my White Dove, but honestly white walls & white trim with white doors all throughout the house would have been too much of my new favorite color. The dark floors and the black doors make the white walls and trim really work well together! Now check out some before, progress, and after pics!


BEFORE 


DURING


AFTER
waiting for countertop installation

Which do you think makes more of an impact? The before pic? or the after?
You know what I think - but I would love to know what you think!
Do you prefer the contrast of white and black? Or do you have something you love even more?Do tell! 

OH! and make sure they spray. Don't let them brush. I'm serious about this.
The only door that was brushed was a pocket door between my office and the laundry room, on the day their sprayer broke. And I sure am glad it's a pocket door because you can see the brush strokes. When it's sprayed, it's perfection.


spraying interior doors


 spraying pantry shelves


Thursday, October 3, 2013

paint 'em white.or die tryin'.

In case you are just joining in on the fun, read the articles from the previous 3 days to catch up! 

:: DAY 4 :: 
In my humble opinion, farmhouse walls should be white. At the least, please not the soggy yellow and dark orange of the walls when we took ownership of this one. Historically, walls of Farmhouses were white because farmers couldn't afford the more costly colors. Just trying to keep it real around here. 


Little did I know that wanting to keep it real with white walls would be the biggest headache I encountered throughout this entire renovation. Think about your house, every room has different light. Different Shadows. Different window placement. Lots of things you don't think about until you are selecting a whole home paint color. 

Y'all, the Hubs thought I was losing my mind. I bought 9 or 10 different sample size sizes of different "whites."  I went to the paint store 3 days in a row, maybe it was even 4. I lost track.  At one point I really thought I might not ever be able to pick a paint color. It was nuts. 


By the time I got upstairs, I guess I had narrowed it down a bit. But hardly. 6 of 9 is barely narrowed down.  

The problem began with the fact that the painter said he preferred Sherwin Williams. Well, hey, I am not a paint snob.  The paint brand wasn't on my list of "Non-Negotiables"... I figured that would be just. fine. Yet that's where the problems started. All 7 of the Sherwin Williams whites that I sampled had too much color saturation for our walls, whether it be yellow, grey, or cream.  

Now here is the kicker, I was trying to pick one white for walls and another for trim.  I was down to the wire, bottles and jars of samples on the paper taped kitchen counters. I threw in the towel for SW and headed to Benjamin Moore. 

While driving, I called my sister-in-law's mom, an amazingly talented Interior Designer in California, and told her I was losing my mind. In a total panic. She was so gracious and talked me down from the ledge, as she was prepping for an install. She also empathized with me and agreed that the Sherwin Williams whites weren't the best options.  Her go to white is Benjamin Moore's White Dove because it doesn't have undertones and goes with everything. That was the exact description I was looking for. Whew! She also suggested that I use the same color on the walls and trim, just different finishes. 


Y'all, I might still be testing paint samples if it weren't for her advice. She was so right. Benjamin Moore's White Dove was perfect. It was the warm white I was looking for, without being yellowish or full of cold grey. I used the EggShell finish on the walls, and semi-gloss on the trim. It. Rocks. And not just in the kitchen. It rocks in every single room!

If you are ever in a white painting pickle, just do yourself a favor and try it. We have received so many compliments on the color, and how perfectly it works with the flooring and door color. (More on that color tomorrow!) 


Tuesday, October 1, 2013

Farmhouse Chic


::DAY 2:: 


Welcome back! 
I hope you all had as much fun as I did yesterday, browsing the range of fabulous topics in this 31 Days party! So many interesting and creative ideas. 

My goal today is to get us all on the same page. To share my vision.  The vision for our Farmhouse. 

Let's see if I can train your eyes to see the potential I saw in some of my before pics, based on what I envisioned for our Farmhouse (FH) to be.  Now don't misunderstand me, I am completely ok with the fact that your vision of a Farmhouse might be different than mine - I just think it'll be more fun for you to look at the before pics and try to guess what I might do in each room.  

I received lots of questions from friends and family as to what my design style would be for this home.  Describing it as "Farmhouse Chic" seemed like the best fit.
I wanted to keep the traditional farmhouse elements, but update, modernize, chic-ify them, so that the style of our family and the style of the home would blend. After all, if it doesn't work for you and your family, then you probably shouldn't do it! 

A great source of inspiration for me was the 2012 Southern Living Idea House. 
I mean if it wasn't many states away, I would just love to live there. 
Everything is clean and crisp, while still being warm, southern, and inviting.  I also love that it feels like a farmhouse without small gingham wallpaper and red roosters in every nook and crany.
When I first saw these pictures, the first thing I noticed was the bones of the house. The floors, the doors, the mouldings, the wood plank walls, and lots of natural light. 


love the bead board vanity updated with a marble countertop


wood planked walls, painted a crisp white & paired with traditional fabrics and a natural fiber rug


doesn't this just make you want to curl up and sip a PSL? sigh.


again with the walls. lovin' them and the staggered artwork up the stairs


Southern Living does a lot of things right. Especially in this renovation. 
In case you haven't seen all of their before and afters, check them out here.

By the time we were finished designing and planning, I had folders in my Houzz account, on Pinterest, in the Peace of Home folder on my desktop and laptop, screen shots on my phone, and on and on. I still feel like I come across pictures that I saved months and months ago.

Hopefully you have a better vision of where we are headed with this renovation, and just to wet your taste buds, here are some before pics... but not too many otherwise that kills the suspense. ha! I'd love to know what you think I will do in each of the following spaces. Who knows, maybe I will have a prize for the person with the most correct guesses at the end of the series!?!
Good luck!

wet bar of previous owner

dining room of previous owner 


Related Posts with Thumbnails